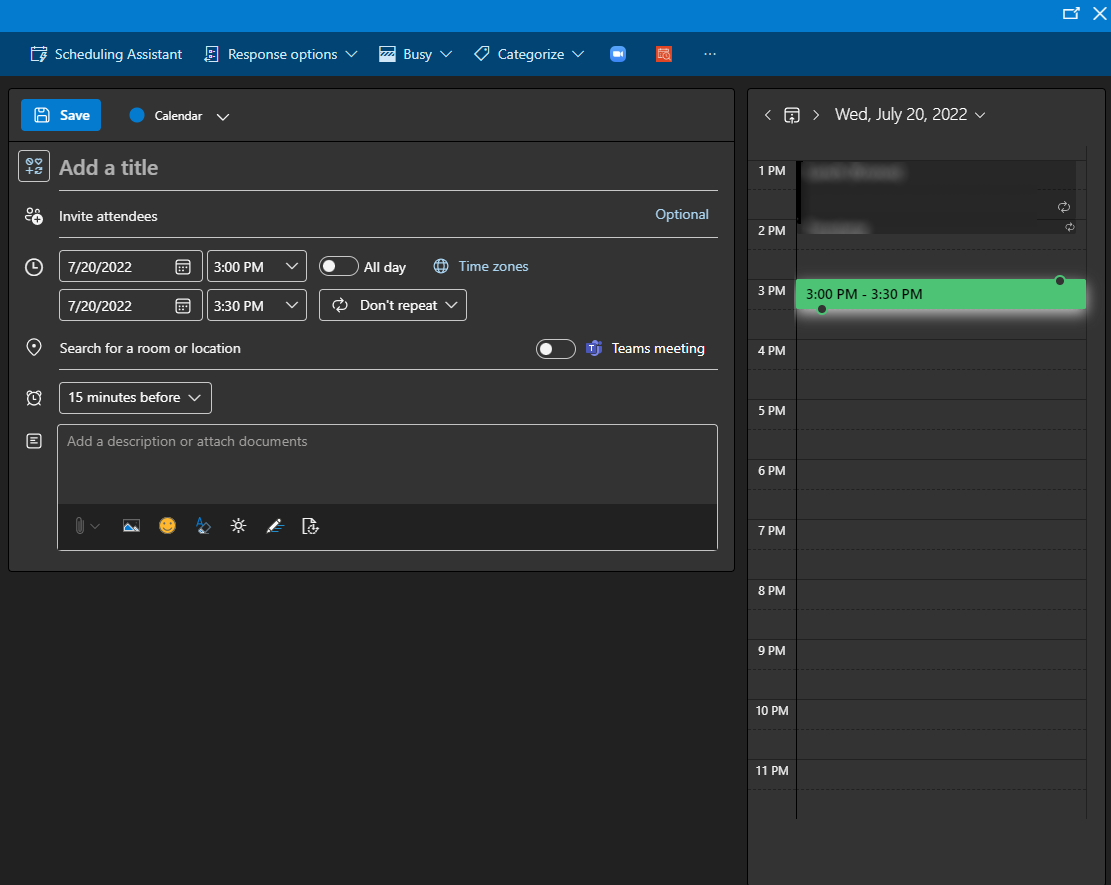
Create a new meeting in Calendar
- Press the New event button in the upper left corner. A calendar event (meeting) window opens up.

- Enter Calendar Event details:
- Meeting Title.
- In the Invite attendees field, the identities of people to be invited to the meeting/event are added.
- Enter e-mail addresses and the system will start to display a shortened list when characters are entered.
- The field permits labeling people as required or optional attendees of the meeting.
- Date and Time of the meeting.
- The All day check box appears beside the Date and Time fields.
- All day will block the workday by default.
- The Repeat option can make the meeting repeat on certain days.
- Meeting Location (there will be a list of U of T rooms, but location may also be entered manually).
- Click Add online meeting to add an ONLINE COMPONENT to a meeting. A meeting may be entirely online or hybrid, where people may be able to use Teams or Zoom to remotely access the meeting.
- Remind me has a drop-down menu for specifying whether there will be meeting reminders issued by Outlook Calendar at various durations prior to the event.
- In the Text Box, more details about the meeting may be provided, such as the agenda, other comments or attachments.
- Clicking the Scheduling Assistant will bring up the scheduling tool that permits viewing calendar availability of the people invited.
- When satisfied that the meeting timing may be viable, press the Done button to return to the main calendar event creation screen.
- The meeting is now ready to be sent to prospective attendees.
- Send – sends the meeting/calendar event invitation.
- Discard – cancels the event creation.
- Private (under the Busy menu) – ensures that no one other than you and those you authorized may see the name of the Calendar Event and any details provided.
