Please note that the import/export function is currently not available in new Outlook for Mac. If you use New Outlook on Mac, we recommend using Apple Mail to copy and move emails between accounts as a workaround. You can also use Apple Mail to copy, export and import your calendar data.
Exporting/importing/archiving UTmail+ account content locally (in addition to keeping it on the server) allows messages, contacts, and calendar items to be accessed when the computer is not connected to the Internet. Please note that when new messages, contacts or calendar items are added to the active account, the archive does not automatically update.
You can also export/archive content to local storage and delete that content from the server to reduce the total storage used that counts towards your storage quota. You maintain a record of any saved content in the archive.
Finally, you can import the archived content into Outlook, Apple Mail and/or Thunderbird and move it to a new account if necessary.
IMPORTANT: Do not download exported content until the message "All folders are up to date" appears at the bottom of your Outlook screen. Otherwise it will only be a partial export. To manually update your folders prior to exporting, select Send/Receive in the Outlook toolbar to update.
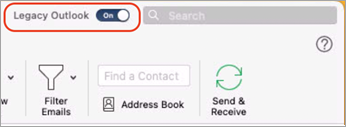
NOTE: The export and import functions are not available in New Outlook for Mac. To see which version you're running, click on the Outlook menu and see if there is a checkmark beside Legacy Outlook. You may also find or adjust this setting in the File menu in Outlook.
How to Export
There are two methods to save messages. Using the Export function, and dragging individual folders to a location on your computer.
Export Function
These instructions allow you to manually export/archive email messages, contacts, and calendar data to an Outlook for Mac Data File (.olm). OLM files can only be imported back into legacy Outlook for Mac.
- On the Tools tab, choose Export. (In newer versions of Outlook, you may find this under the File tab).
- In the Export to Archive File (.olm) box, check the items you want to export, and choose Continue.
- In the Save As box, under Favorites, choose the Downloads folder, and click Save.
- Once your data has been exported, you'll get a notification. Choose Finish.
How to import
Outlook for Mac can import data from an older version of Outlook, an OLM file exported from Outlook for Mac, or a PST exported from Outlook for Windows.
- Click File and choose Import.
- Select the option for what you would like to import and click Continue.
3. Browse to find the file, select it, and click Import.
4. Click Finish. You can find the imported data under On My Computer, which you can then move to an existing account on Outlook.
NOTE: The On My Computer folder can sometimes be marked as hidden in Outlook. To unhide it:
- Go to Outlook > Settings > General.
- You'll see an area called Sidebar. If the box labelled "Hide On My Computer folders" is selected, deselect it.
3. You should then see the "On My Computer" folder appear in your email folders in the left-hand sidebar.
Drag and drop individual mail folders to computer
This will give you a .mbox file which could then be imported back into legacy Outlook for Mac or Thunderbird, or moved to Local Folders in Outlook.
Click on a folder and drag it to a location on your computer such as the desktop. This will create a .mbox file. These files can be imported into Apple Mail or Thunderbird, or can be added to Local Folders or the "On My Computer" folder in Outlook.
Updating all folders
If you wish to ensure all folders are synched and up to date after finishing an import or export, select the Send & Receive icon in the upper toolbar.
Once the folders are updated, the message "All folders are up to date" should appear at the bottom of your Outlook window.